Adding audio files to your Moodle class can be a good way to increase the variety of course content for your students. Whether you record your own audio, download podcasts, or find audio from another source, it is easy to add the audio to your class. Moodle can play .mp3 and .wav audio files, so it is best to stick with those formats.
Login and turn editing on

Login to your class and then turn editing on.
Method 1 - Add a file
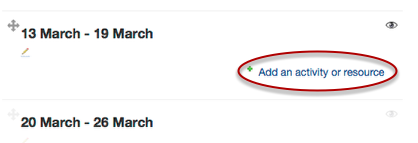
Locate the section of your class where the audio file will be added. Click Add an activity or resource.
Add a File Resource
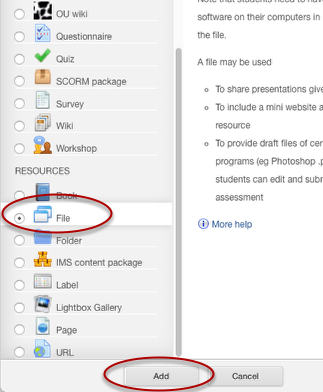
Scroll down until you see the list of Resources, then click the radio button next to File. Click the Add button to get started.
Fill in the File form

Fill in the Name (1) and Description (2) fields with the appropriate information. If you want the Description to be visible to students on the class home page, click the box next to Display description on course page (3). The next step will be to drag the audio file into the Content area of the form (4).
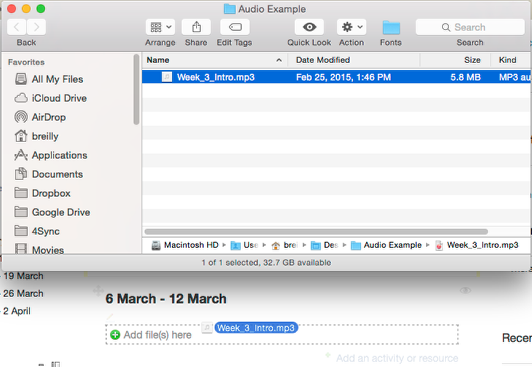
Locate your audio file

Find the audio file you want to add to your class. In this example, the file is inside a folder which I have opened and positioned above the File form. Click and drag your audio file(1) into the Content area (2) of the File form.
Drop the file into the Content area
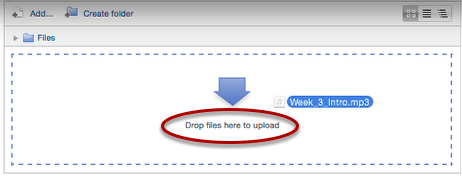
Drag the file (or files) into the Content area until the description under the arrow changes from "You can drag and drop files here to add them" to "Drop files here to upload". Now drop the file and it should be uploaded to your class.
File is added
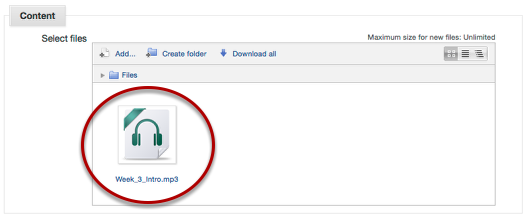
Once the file has been uploaded, it will appear with the file name and a headphones logo in the Content area.
Save
Scroll to the bottom and click Save and return to course.
Try it out

On the class home page, turn editing off to see how the audio file will appear to students. Click on the title of the audio file to play it.
Audio playback

Your audio file should be loaded into Moodle's audio player with the description shown below it. Click the play icon to listen to the audio.
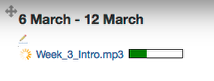
Method 2 - Drag and drop onto class home page
This method for adding an audio file is the same as it would be for adding any file or files to your class. Turn editing on, then open the folder containing the file or files to be added. Drag and drop the files onto the course section where you want to add them. They will always appear at the bottom of that section, so if there are many Activities and Resources already in the section, you may need to scroll down to see the files you have just added.
Watch the file upload
Moodle will display a progress bar as each file is uploaded. If you don't see this, try to drag and drop the file or files again. In some cases, it can be tricky to get this to work.
File is uploaded

Once the file uploads, it can be played back by clicking on the title, as in the previous example. You can use Moodle's editing tools to change the name of the file and to add a description.
Comments